Samsung Galaxy S24FE - First Things To Do ( 30+ Tips & Tricks )
Just pick up the Samsung Galaxy S24 FE? If you’re looking to set it up the right way, customize it for easier use, and unlock its full potential—including the next-level AI features—you’re in the right place! I’ve been using Samsung Galaxy devices since the Galaxy S3, so I know a thing or two. Let’s dive in, and I’ll show you how to truly master your new Galaxy!
Fingerprints
One of the first things you should do on day one is set up your biometrics properly. Do it once, do it right, and you’re set! There are a couple of ways to access your settings: swipe down and tap on the settings icon, or swipe up to find it in the app drawer.
For this video, I’ll add the settings to the home screen since we’ll be using it a lot. Start by opening your settings and scrolling down to the Security and Privacy section. From here, scroll to Biometrics.
Now, if you set this up initially, you might have only added one fingerprint. But here’s a pro tip: don’t stop at one. Register your index finger and thumb on your dominant hand, plus your thumb on your non-dominant hand. To do this, tap Add Fingerprint and follow the prompts, tapping your finger on and off the sensor.
Remember to adjust the angle of your finger to capture the edges and tip. Once done, select Add Another and repeat with your other thumb. With this setup, no matter how you pick up your phone, you’ll unlock it instantly.
Face Unlock
To make unlocking your device even quicker, here’s an optional tip: set up Face Unlock. Head back to Settings, navigate to Security and Privacy, and go into Biometrics. From here, select Face Recognition, then follow the prompts to scan your face—good lighting makes it faster and more convenient.
If you often wear a mask, heavy makeup, or accessories that change your appearance, you can also add an alternative look to improve recognition accuracy. And if you’re concerned about security, especially when sleeping, be sure to enable the “Require Open Eyes” option. (And if you happen to sleep with your eyes open... well, that’s another story!)
Wallpapers
Customizing Wallpapers on Your Galaxy Phone
Hold down on your home screen, select “Wallpaper and Style,” or access it through Settings.
Create Unique Wallpapers with AI
In “Change Wallpapers,” scroll to the AI section to generate custom wallpapers using word prompts. Choose a template, adjust keywords, and the AI creates personalized images for your lock and home screens.
Real-Time Weather Effects
Samsung’s “Photo Ambient” feature adds real-time weather effects to your lock screen wallpaper. Whether it’s sunny or raining, your lock screen reflects the conditions outside.
These features make Samsung Galaxy customization easy and engaging, helping you personalize your phone like never before!
Make Use Of The Space
How to Maximize Screen Space on Your Samsung Galaxy
Even though the Galaxy S24 FE isn’t quite as large as the Ultra, it’s still a big phone with plenty of screen real estate. One simple customization that can enhance your experience is adjusting the home screen grid size to fit more apps per page. This not only organizes your home screen but also reduces the need to swipe through multiple screens.
Steps to Customize Grid Size:
1. Access Home Screen Settings: Press and hold an empty spot on your home screen until the settings menu appears.
2. Select Grid Size: Choose the “Grid Size” option. By default, it’s set to 4x6, but you can change it for the home screen, app screen, and folder layout.
3. Maximize with a 5x6 Layout: Set the home screen grid to 5x6 for more app slots. Once you hit “Done,” you’ll instantly see extra spaces on your screen, even allowing an additional app in the taskbar.
With these adjustments, you can make better use of your Galaxy’s screen, keeping essential apps within easy reach. This small change makes your Galaxy even more user-friendly!
Custom Clock
Here's a customization I always add on day one, though it’s totally optional:
I prefer having a larger, visible clock on my home screen. While the time displays at the top, I like a more prominent option. For this, download the Google Clock app from the Play Store. Although Samsung has its own Clock app, I find Google’s widget more visually appealing.
By default, the weather widget might take centre stage on your home screen. If you want to remove it, just press and hold on to it, then tap “Remove.” Now, to add your clock, press and hold an empty area on the home screen, select “Widgets,” and scroll down to Google Clock options. There are several styles, but I recommend the analogue clock or the scallop style, both of which display the date as well.
This setup not only gives you a convenient, visible clock but also unlocks a hidden feature on your phone, which I’ll cover later!
Widget Stacks
Moving on to tip 6! In the previous tip, we covered adding a widget, but let’s take it a step further—Samsung's widget stacking feature makes excellent use of home screen space.
For instance, instead of the standard Google search bar, you can turn it into a stacked widget. Just hold down on the Google search bar and select “Create Stack.” You’ll then see options to stack additional widgets behind it. Some of my favourites are the Device Care widgets, like storage and optimization, which allow you to swipe between them as needed.
Samsung also lets you make these widgets transparent for a cleaner look. Just press and hold on to the widget, go into settings and adjust transparency as you like.
To add more widgets to the stack, hold down on it again, select “Edit Stack,” and scroll to the plus icon to explore more widget options. Keep in mind that the shape of the stack (row vs. square) will affect the available options, so adjust according to your layout preferences.
Getting Up To Date
The basics we’ve covered so far are essential, but here’s something crucial that many people overlook, assuming it happens automatically (which it does, but not right away). If you want your phone running smoothly and optimized right out of the box, follow these three steps:
Update Your Software: Go to Settings > scroll to Software Update > select Download and Install if updates are available. This is a quick way to get your phone running the latest software.
Update Google Play Apps: Open the Google Play Store (Android’s app equivalent to the iOS App Store). Tap your profile icon in the top-right corner, select Manage Apps and Device, and you’ll likely see several pending updates. Tap Update All to ensure these apps are up-to-date for the best performance.
Update Samsung-Specific Apps: Open the Samsung Galaxy Store for updates to Samsung’s first-party apps that aren’t available in the Google Play Store. Tap the menu (bottom right corner) to see pending updates. Some of these apps are essential for Samsung’s advanced features and won’t update automatically, so make sure to tap Update All.
These updates are important for getting your phone’s AI features and other functions working optimally from day one. With this setup, you’re ready to dive into everything your Galaxy phone has to offer!
Navigation
Now, let’s dive into the customization section. When you first set up your Galaxy phone, you’ll notice it defaults to the classic Samsung navigation bar with the home, menu, and back buttons. However, if you’re used to iOS or another Android system that uses swipe gestures for navigation, you might want to switch it up.
Here’s how to change it (something I always do on day one, though it’s totally optional):
Open Settings.
Instead of looking under Gestures and Controls, go to Display.
Scroll down to find the Navigation Bar and tap on it.
Here, you can switch from button controls to swipe gestures, which I find more convenient—and it frees up space at the bottom of your screen.
Choose whichever option feels right for you!
Custom Lockscreen
One key customization to tackle on day one is setting up your lock screen with personalized information and shortcuts.
Accessing Lock Screen Customization: Start by pressing and holding an empty space on the home screen, then go to Wallpaper and Style. On the left, tap Lock Screen, where you’ll see areas outlined for customization.
Adjusting the Clock: Tap on the clock to access font and size options. You can resize it by dragging the dots, and adjusting the colour for readability—make sure it stands out against your background. Use the colour spectrum to tweak saturation and transparency if needed. There are also style options, including an option for a full calendar display.
Adding Widgets: Below the clock, tap Widgets and the plus sign to add useful tools. For instance, if you use Galaxy devices, add the Battery Life widget to monitor battery levels for connected devices like your Galaxy Watch or Ring.
Adding Contact Information: For safety, add contact info at the bottom where it says Contact Information. This allows someone to reach you if they find your phone—consider adding an alternate email or phone number.
Customizing Shortcuts: By default, the left shortcut is the phone, and the right is the camera. You can change these to any app, such as the flashlight, Samsung Wallet, Google Wallet, or the voice recorder.
Now your lock screen is customized and ready for daily use!
The Power Key
Let’s dive into customizing the controls for a more streamlined experience. Head into Settings and locate Advanced Features. Here, select the Side Button to customize the power key’s functions.
Remap the Power Button: By default, the power button locks the screen, and holding it activates Bixby. If you don’t often use Bixby, you might prefer to repurpose this button. For example, set the Hold option to open the Power Menu. This makes it easy to switch off the phone or access important features like emergency SOS calls or view medical info if needed.
Set Up Double Press for Quick Access: The Double Press on the side key can be extremely useful. Instead of defaulting to the camera, you can set it to open an app like Google Wallet or Samsung Wallet. Now, when you need to pay quickly at a register, double-pressing the side button opens your wallet with all your cards ready, making checkout seamless.
This customization enhances convenience and efficiency, making your side button work for you in daily situations.
Colour Schemes
Here’s how to add more personality to your UI! By default, the colours are mostly grey and white, which can feel a bit plain. Fortunately, you can easily customize the colour palette to make it more vibrant.
Setting Up Your Color Palette: Press and hold an empty area on your home screen, then go to Wallpaper and Style. Here, you’ll see Color Palette options. When enabled, the system UI adapts to match your wallpaper’s colours. For example, if your wallpaper has purple and pink hues, the UI will offer a range of complementary options, like blue-turquoise or green. Choose your favorite and tap Apply.
Applying the Color Palette to Icons: Take it a step further by enabling Apply Palette to App Icons below the colour palette options. This will theme all default apps in your chosen colour scheme, creating a cohesive look across your device.
If you want a new look altogether, switch up your wallpaper and reapply the colour palette. After organizing your apps and adding a few widgets, you’ll have a fully personalized home screen that suits your style!
Better Organisation
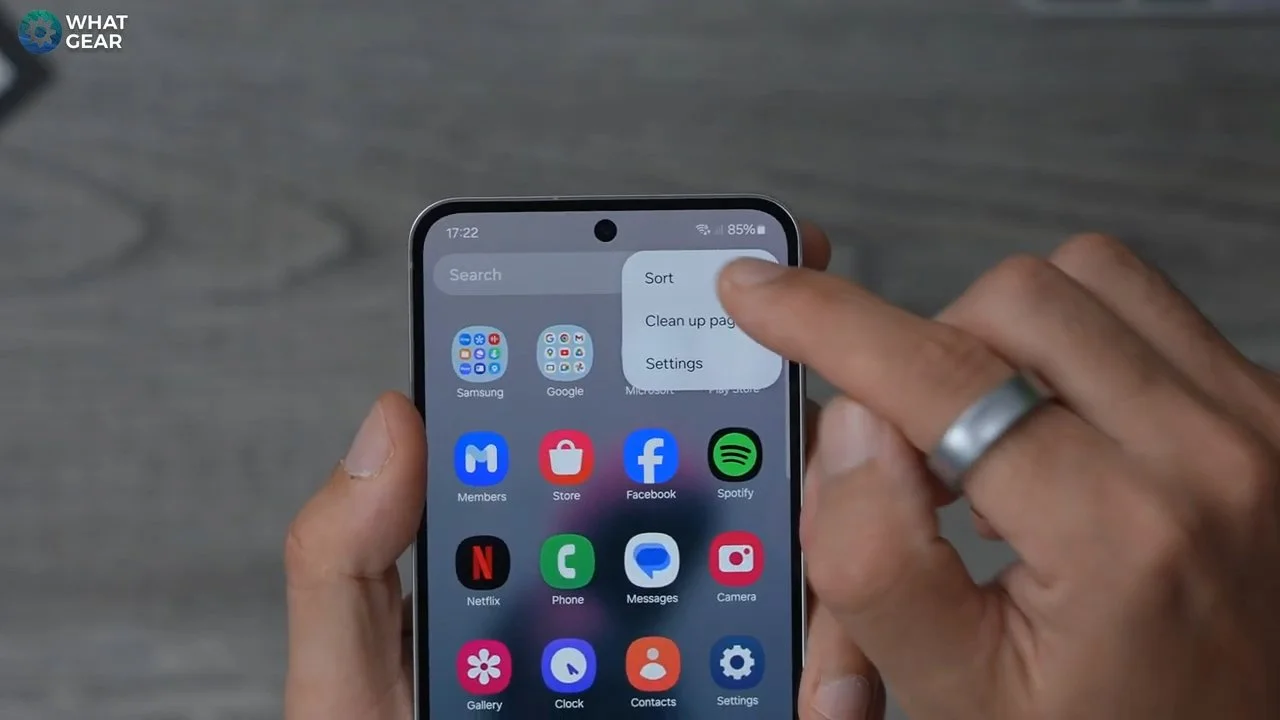
And here's a little bonus tip for you guys when it comes to customizing your home screens. When you swipe up from the bottom, you have all of your apps here, but you'll notice they're in no particular order.
They're just kind of all over the place, and the phone tries to predict what apps you might want to use next. But when it comes to actually finding the apps is much easier to do. If you do this, hit the three dots in the top right corner go to sort at the top and change it to alphabetical order.
Now next time when you swipe up for your app drawer, everything will be where it's supposed to be and you can find it much more quickly.
Embrace the Dark
Here’s another customization tweak worth considering. It’s optional, but I’ll explain why it can be beneficial before showing you how to set it up.
Enabling Dark Mode: Go to Settings, scroll to Display, and toggle on Dark Mode at the top. You can also schedule Dark Mode to turn on at specific times. Personally, I keep Dark Mode on all the time—it makes things more visible and easier to read, in my opinion.
Benefits of Dark Mode: Dark Mode can help conserve battery power. In darker parts of the screen, like the settings menu, pixels are turned off entirely, saving energy. Plus, the darker look often makes the text stand out better and even enhances certain widgets, like the Google clock we set up earlier.
And stay tuned because using Dark Mode unlocks a secret feature I’ll show you in a few steps!
Get An Edge
Let’s go through this one quickly. One handy feature on most Samsung Galaxy phones is the Edge Panel.
This is the translucent line along the screen edge. Swipe it open to access a variety of tools. Since many of the default options may already be on your home screen, you might prefer to use the Edge Panel for AI tools or less frequently used apps that don’t need to be in your main view.
Customizing the Edge Panel
Tap the pencil icon in the bottom right to edit.
Use the minus icons to remove any default apps you don’t need.
Tap the plus to add your own selection. Consider adding tools like Samsung Notes, Voice Recorder, and Samsung Files for quick access to notes, recordings, or downloaded images.
I’ll leave one space to show you a powerful Galaxy feature: App Pairing. With this, you can play a YouTube video or podcast in the background while multitasking—no YouTube Premium needed! Stay tuned, because in a few years, maybe the iPhone will get this feature too!
App Pairs
Setting Up Split Screen and Edge Panel Tools
Split Screen Mode:
Option 1: Swipe up from the bottom, tap on the desired app icon, and select "Open in Split Screen." You can then choose a second app to share the screen.
Option 2: Open the edge panel and drag an app onto an open app to activate the split screen.
Saving App Pairs:
Once you've set up an app pair, tap the three dots in the centre, select the star icon, and add it to the edge panel for easy access. You can also save it to the home screen if you prefer.
Edge Panel Settings:
Swipe out the edge panel from the bottom left corner briefly to access Settings, where you’ll find a library of edge panel options.
Suggested Tools:
Clipboard: The Samsung keyboard saves a history of copied text, making it easy to retrieve multiple items.
Compass: A handy tool available right in the edge panel.
Customizing Edge Panels:
Explore the edge panel settings and add the tools you find most helpful.
Experiment with these features to set up a customized multitasking experience that suits your needs.
Custom Quick Settings
Customize Your Quick Settings
Accessing Quick Settings:
Swipe down from the top twice to open the full Quick Settings menu.
Customizing Your Quick Settings:
Tap the pen icon at the top of the screen to enter edit mode. The first row appears with a single swipe down, but the full page can be customized.
Swipe across to see additional blank spaces and available tools at the bottom.
Recommended Tools:
Dolby Atmos: Toggle this on to enhance your speaker quality—test it out to see if you like the difference.
Secure Wi-Fi: An important addition for enhanced security, which we’ll explore further in the privacy section.
Secure Folder: Ideal for confidential files.
Reordering:
Drag and drop icons to rearrange the order of your Quick Settings for easy access.
Quick Settings Instant Access:
To streamline access, go to the pen icon, locate Quick Settings Instant Access, and enable it. Now, swiping down from the top-right corner opens the full Quick Settings immediately, while swiping down anywhere else follows the usual two-step swipe.
This setting is a must-have for day one, making navigation quicker. And as a bonus, stay tuned for the hidden feature that the clock can unlock!
Bedside Clock
Go into your settings, scroll down, and go to display. Scroll down again right to the bottom and you will see screensaver. Go to this and in this menu, you will now see the Google Clock.
With this enabled, when your phone is charging at night or on your bedside table, it will display a clock which is very dark but readable even at night.
So if you wake up in the middle of the night and you're wondering what time it is, it will be visible. Although it won't blind you and it will move around on the display, so it's not going to damage the display or anything like that if it's in one spot permanently.
There are, of course, other options here, like the colours, the photo frame, the photo table, and Google Photos. If you want to show photos while your phone is just resting on a desk, that can also be an option as well.
Custom Notifications
All right, this next one is very useful. So if you jump into your settings again scroll down to the notification section.
And here go to Notification Pop Up Style. Here you will see the options colour by keyword. This is incredibly useful and it does work best with people's names.
So people in your phonebook for example, I'm going to put my own name here, add the keyword, hit the plus, and then you can choose a colour for messages that come through from that specific person.
So I'm going to set it to green for example hit done. Now whenever a text message comes through from a person with that name, it will show a notification in that color. So you can set up an individual colour for each person in your family. And when you get a notification, you'll be able to instantly identify who is from just based on the colour.
Notification Animations
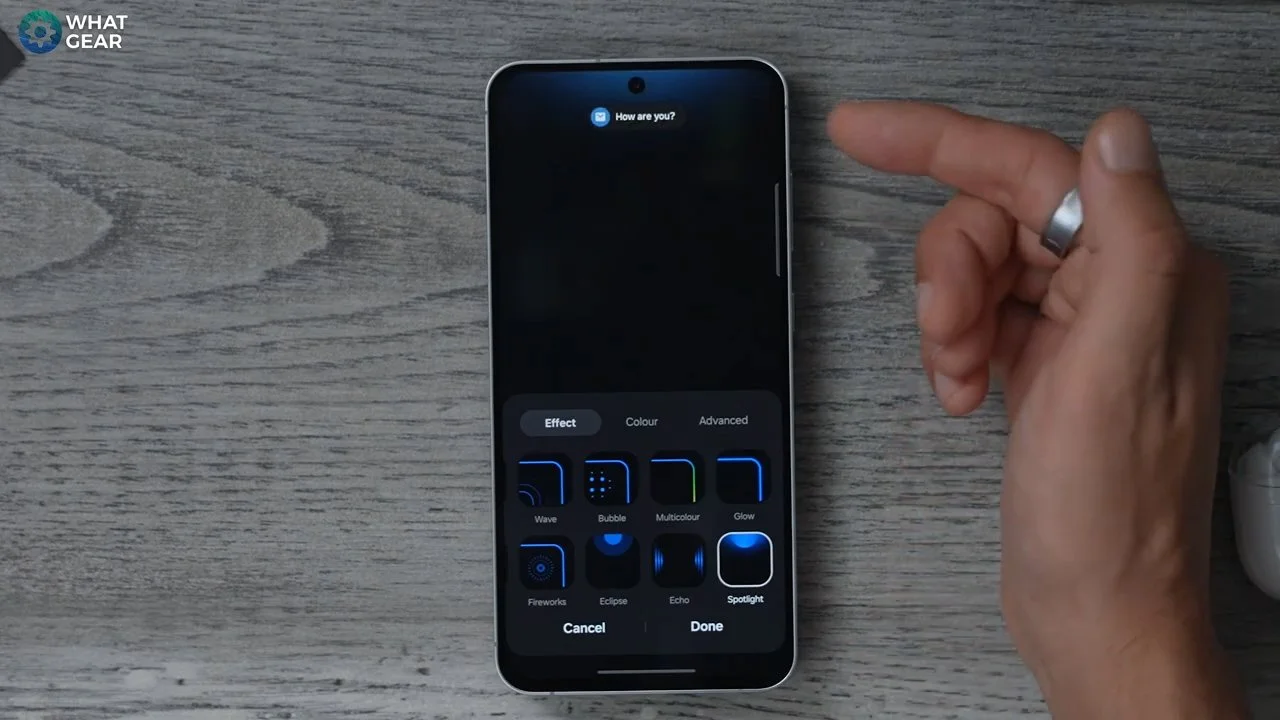
And if we go back one step, there is a way to amplify this effect even more so this is tip number 18. Within the same options menu, the notification pop-up style. Right here in the middle, you see edge lighting style. And here you can get really creative with how your notifications appear. There are a bunch of different styles to choose from.
Some of them light up all around the edge of the display. I'm a fan of the spotlight effect, where it just kind of flashes at the top of the screen here, and you can actually change the colour.
If you leave it on auto, it will use the colour by keyword. So I do recommend you leave it on auto.
But if you want to set a permanent colour for all messages, you can choose a colour here. You can also adjust the transparency and duration of the animation. There are some really cool effects here. Some of them are a bit more dramatic than others, so play around with it. See which one you like, customize the colours and make it unique and tailored to your personal style.
Custom Sounds
Now, before we move on to security and privacy, I do want to share with you guys one of the apps that I use for customizing notification sounds and it is called Zedge. This has sounds from pretty much all the movies you can think of, and all of the games you can think of. However, one disclaimer about this app is it's full of adverts, so you kind of have to work around those and try and avoid opting into things.
There is a subscription plan for this, but you don't need to subscribe in order to use it. Just hit the cross in the top corner here, go to the sound section, go to Notification Styles and just type in what you're looking for.
I actually really like the sound effects from the Zelda Breath of the Wild game, because in that game he's got this kind of tablet thing which alerts him to stuff and it just works well as a notification sound.
And yeah, you're going to have to work around the video adverts in this. This is how they're able to give away all this stuff for free. Once you've found a sound that you like, you can just hit download and actually you can set it to your notification sound straight away here from the Zedge app. Anyway, that was just a little bonus tip.
App Security
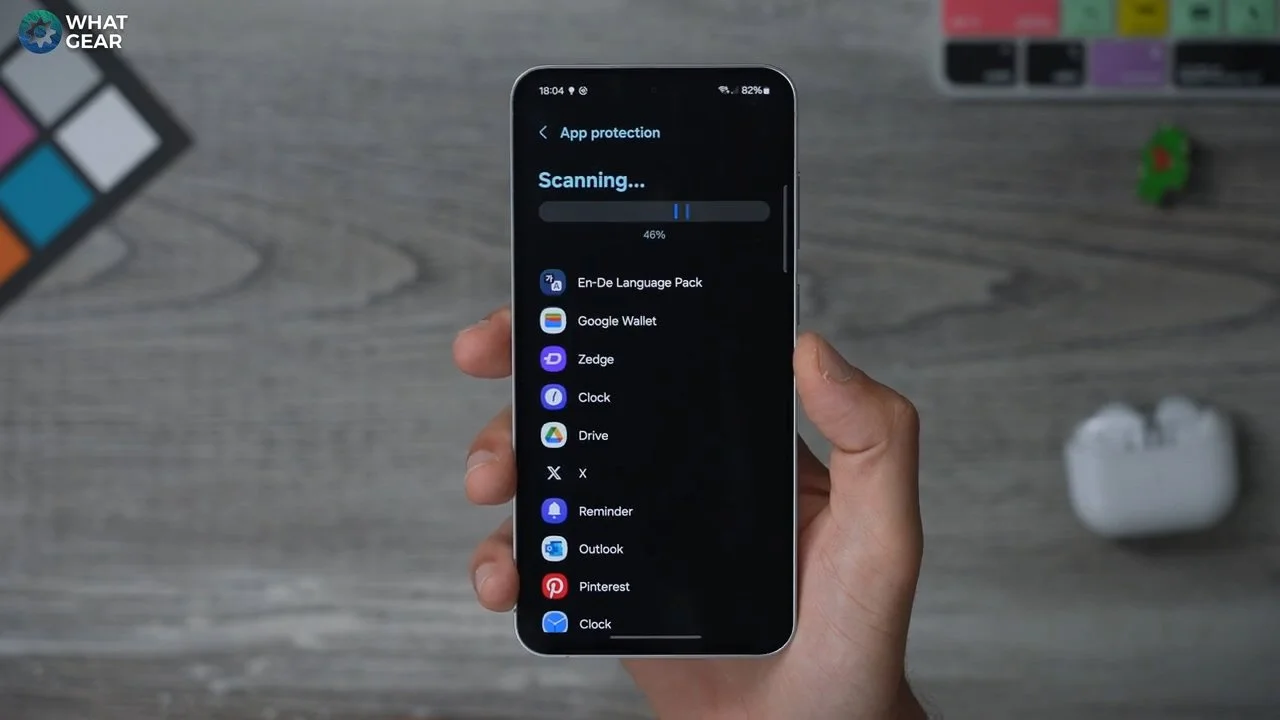
Now let's move on to the very important security features and privacy features on the device. So this time jump into the settings and we're going to scroll down to Security and Privacy. As soon as you enter this page, you will see that it does a bunch of scanning on the device. And if you see any suggestions here, you definitely want to take a look.
And one of the things that is switched off by default is the app security. So if you tap on that go to App Security here and switch it on.
This just adds an extra layer on top of the Google Play Store scanning of apps. And this will be especially useful if you're downloading APKs outside of the Google Play Store.
So make sure this is switched on, and if you want to, you can scan the device to see if any dodgy apps have already been installed, which they really shouldn't be. If it's a brand new phone, okay, remember when we were doing the quick settings here at the top and I said to add the secure Wi-Fi? Well, here's why.
Secure Wifi
If you enable this essentially is a free VPN on Samsung devices. It does have some limitations, though, that you need to be aware of, but it's very, very useful when connecting to public hotspots. So if you just set this up for the first time you get one gig for free per month, with this service, you can pay and have more if you want to.
Or you could of course get a third-party VPN, but you might as well make use of this one if you don't have a VPN already. Right now is connected and protected, and we can stop it at any time. And if you're really worried about your data being stolen when on unknown Wi-Fi networks, you can enable Auto-Protect here at the bottom, and you do need to set it to allow all the time.
And if you're interested in how much it costs to use the premium services, just tap on the protection plan, hit and go to upgrade. And here is how much they would charge per month for unlimited usage. And then there's also a 24-hour option as well. So if you are out of the country and you're connected to a hotel Wi-Fi or something like that, you can just pay £0.89 for the day.
So definitely be aware of that tool and use it when necessary. You don't want to end up getting hacked. Account hacker hack carrier jammer now until after the attack. Got to hacker.
Worst Case
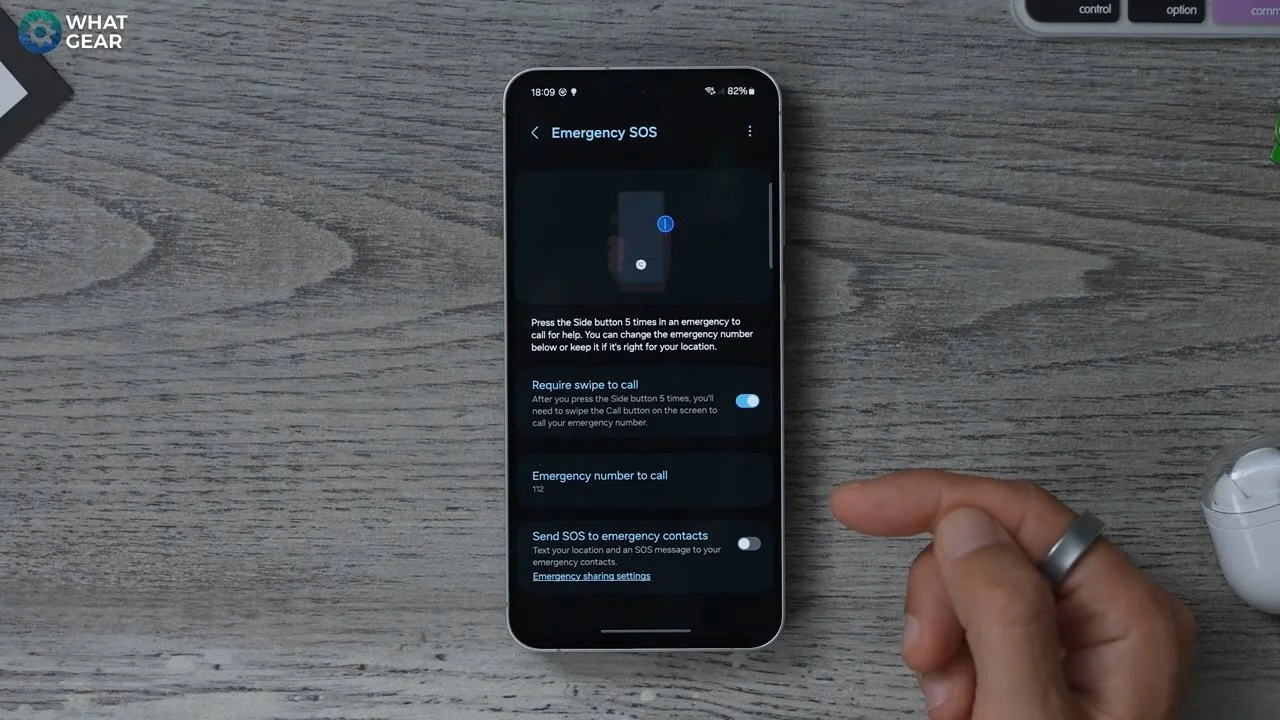
This next one's a safety and emergency tip that you'll be glad you did. If one day something bad should happen. So check this out. Go into your settings, scroll down to Safety and Emergency, and here you can fill out your emergency info and here you can also add emergency contacts.
So you can set up your local emergency service or private guard service, or family members who live nearby, for example, and will come into play if there happens to be an emergency SOS situation.
So this is what I really want to show you. The emergency SOS, if you go into this, if you tap the side key five times, when you're in an emergency situation, will automatically call the emergency services.
But if you tick this box here at the bottom, you can send an S.O.S. message to your emergency contacts. This will send you a location and a default message that will let them know that you are in trouble. So this is something that hopefully you will never have to use. But like I said before, you'll be glad you set it up.
Passwords and Passkeys
Okay, so this next privacy security tip has to do with the passwords on your device. By default, Samsung phones use their own auto-fill service. However, if you're coming from a Google phone or if you use Chrome a lot on your PC, for example, you may prefer to switch this to Google Pass-keys and password. Here's how you do that.
So if you jump into your settings menu, go to General Management. Here you will see passwords, pass keys and autofill. And you have the Samsung Pass which the phone uses by default.
And then you have the Google services as well. So if you tap on the Google services here, you can enable Google as the preferred autofill service.
So all of the passwords that you have linked to your Google account will auto-fill. When you're browsing the internet and using apps on your device.
Samsung Find
Now, this next one is very, very important, and that's why I mentioned you should add it to the edge panel right here, the find app. So if you have other Samsung devices like the buds, the watch, the ring, and maybe a tablet and things like that, you will definitely want to set this up
So Samsung Find will allow you to keep tabs on the location of all your devices even if they're switched off. So definitely spend a bit of time setting up the Samsung Find app. It could be a lifesaver if you lose your phone or any of your devices.
Theft Protection
Theft Protection: A New Tool on Samsung Galaxy Devices
Losing your phone is one thing, but it’s even worse if someone grabs it and runs off. Samsung’s latest Galaxy devices now come with a new theft protection feature designed to tackle just that.
Setting Up Theft Detection Lock:
Go to Settings > Security and Privacy, and look for Theft Protection.
Enable Theft Detection Lock to activate this feature, which detects if your phone is quickly taken away from you, automatically locking the device.
Extra Safety Options:
You can choose to activate Offline Device Lock, which restricts access even without an internet connection.
There are also the Remote Lock and Find and Erase Device options, offering peace of mind in case of theft.
In areas where phone snatching is common, this feature could be especially helpful. Now that we’ve covered safety, let’s dive into some of the more fun features Samsung offers!.
On Device AI
And my favourite things to play with on Samsung Galaxy phones these days. It is, of course, Galaxy AI. So one of the first things you want to look at when it comes to AI is this naphtha probe. So if you scroll down there is the Galaxy AI section here. If you are a private kind of person and you're worried about AI taking over the world.
Then you might not be comfortable with sharing data online quite so much. If that is you, you might want to scroll to the bottom of this page and enable process data only on the device.
This will limit how much of the AI stuff I'm about to show you you can do on a device, but you still be able to do some of it.
But I suggest you keep watching to see what the AI can actually do first before you switch this off. Because some of this stuff is so good, it might actually make you change your mind if you're leaning towards pushing this button here.
Upgraded Assistance
So one of the coolest ways to use AI, and something I find myself doing more and more these days is actually using it as a voice assistant.
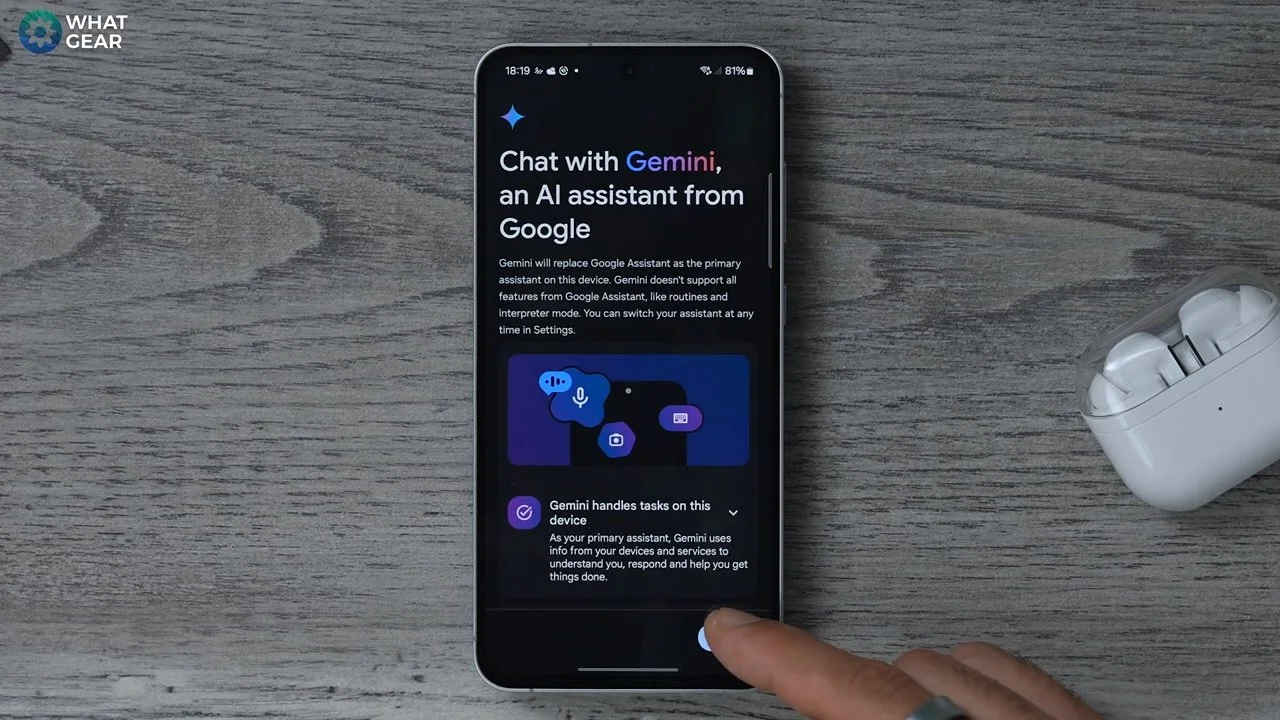
So if you swipe up diagonally from the bottom right corner like this, you'll see straight away it defaults to Google Assistant, but you can switch it to Gemini. Just tap on that. Hit more code to continue. Use Gemini.
Now your assistant will be a combination of the classic Google Assistant and Gemini, so if you swipe in from the bottom right corner, you'll see now it looks a bit different.
So with this tool now, it's way more intelligent than it's ever been before. You can harness the power of AI to brainstorm ideas and even just have a conversation.
Circle to Search
Anyway, here's another very powerful tool. Let's say you're browsing the internet one day and something catches your eye, but you don't really know what it is, and you want to learn more about it.
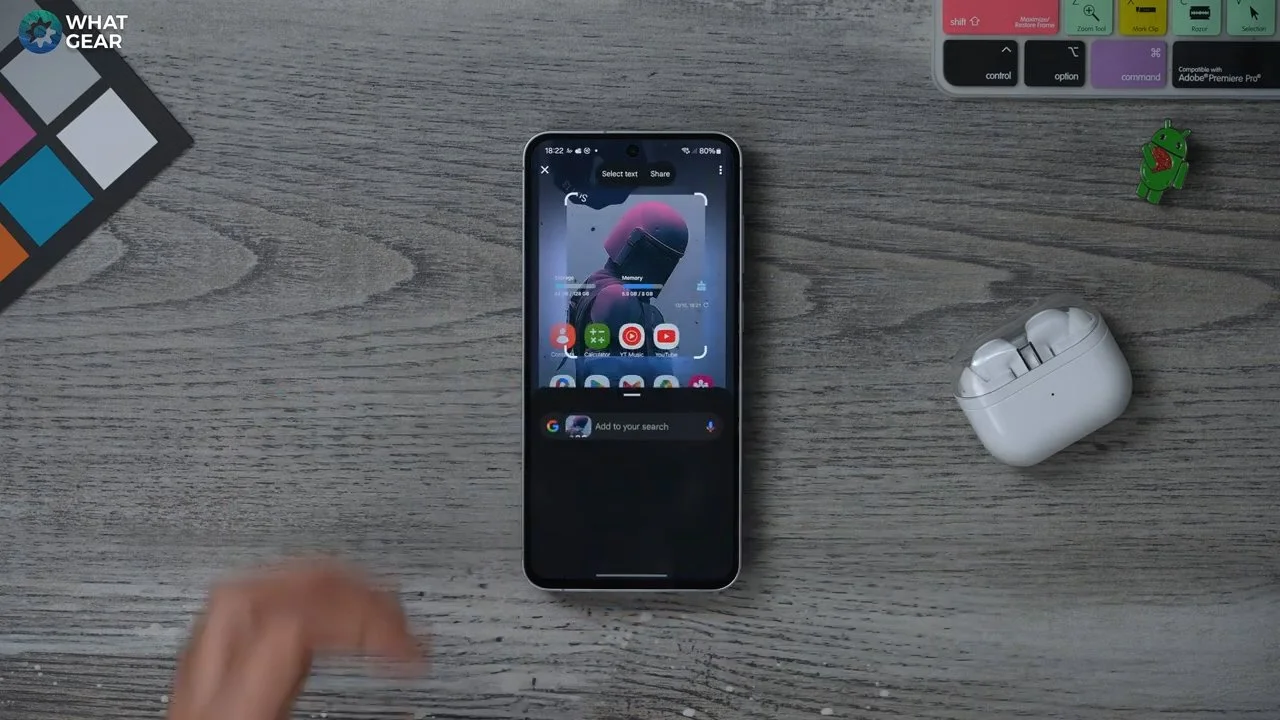
If you hold your finger down on either the home button or the line at the bottom of the screen here, you can now circle to search for anything on the screen so the screen will light up like this. You can draw around the area you want to search. It will then search what you've highlighted and give you a bunch of results.
And there we go. It's actually even found the exact image on my website that that has come from. You'll see there's options to buy it and all that kind of stuff. So circles the search is very, very useful. Let's see if it recognizes Boba Fett in the background here. It did. And it actually even found the wallpaper online as well.
So Circle to Search is a very powerful AI tool. And I do recommend you make the most of it.
AI Art
Now here's a really, really cool one within the Samsung Gallery app, if you open up a photo, here's one I took earlier.
if you tap on the photo at the bottom, you'll see the sparkly stars. This is the sort of AI icon that's being used everywhere now, so if you tap that, you get a few options and the first time you use it will actually show you what it can do.
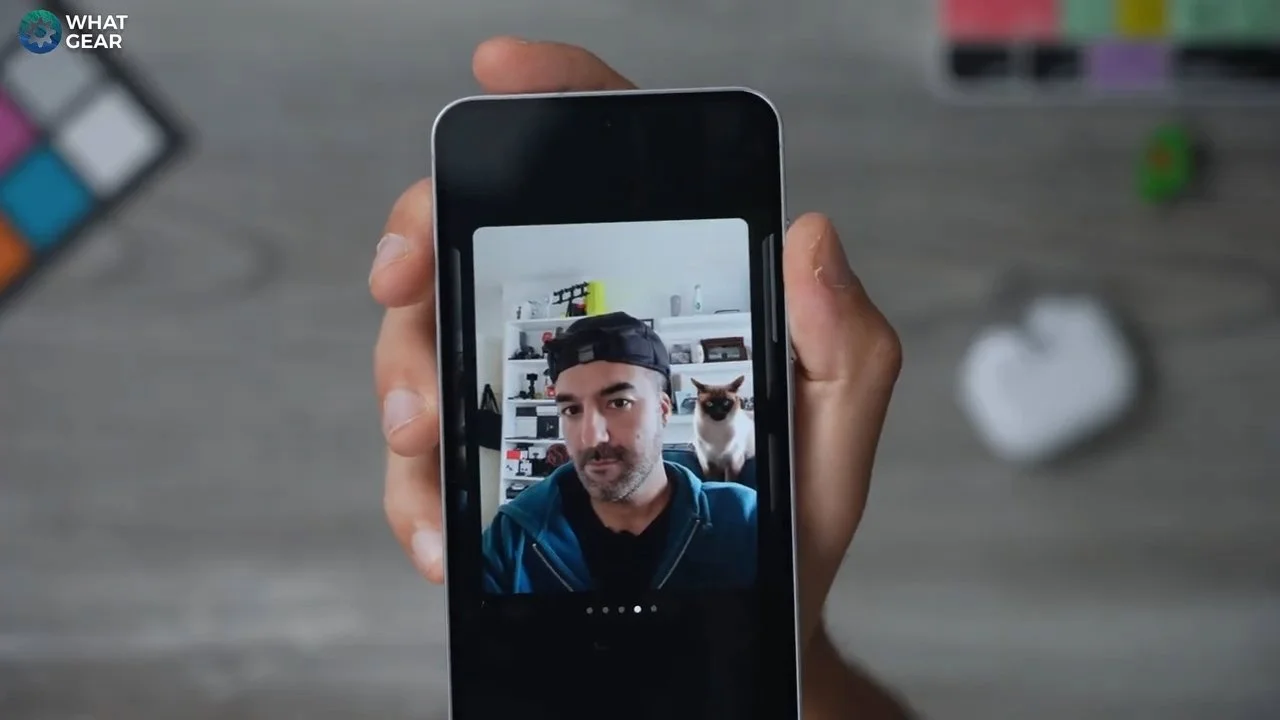
If you tap this here that says Portrait Studio, you can turn this image into a comic-style image, a 3D cartoon image, a watercolour painting, or even a sketch.
So let's go with 3D cartoon Pixar style. And there we go. We have a Pixar version of me, and you can save a copy of these to your device and even use them as wallpapers. If you wanted to.
Sketch to Image
Okay, here's another really fun tool. If you hit the I stars at the bottom with the image again, this time hit sketch to image.
Now we can actually draw something on this image, and it doesn't even need to be a great drawing for this to work. It does need to be kind of recognizable though, so I'm just going to draw something real quick.
That is my very bad attempt at drawing a cat. And there we go. It's actually added a cat in the background of the image, and it looks surprisingly real.
Sometimes, but you get the idea. You can create anything with AI within an image.
Magic Resize/Erase
Okay, so here's another little photo AI trick, and it's a great tool to use if you want to adjust an image that you've already taken. But also great for removing photobomb is from an image. So if you go to one of your photos, I've just taken a photo here on the desk.
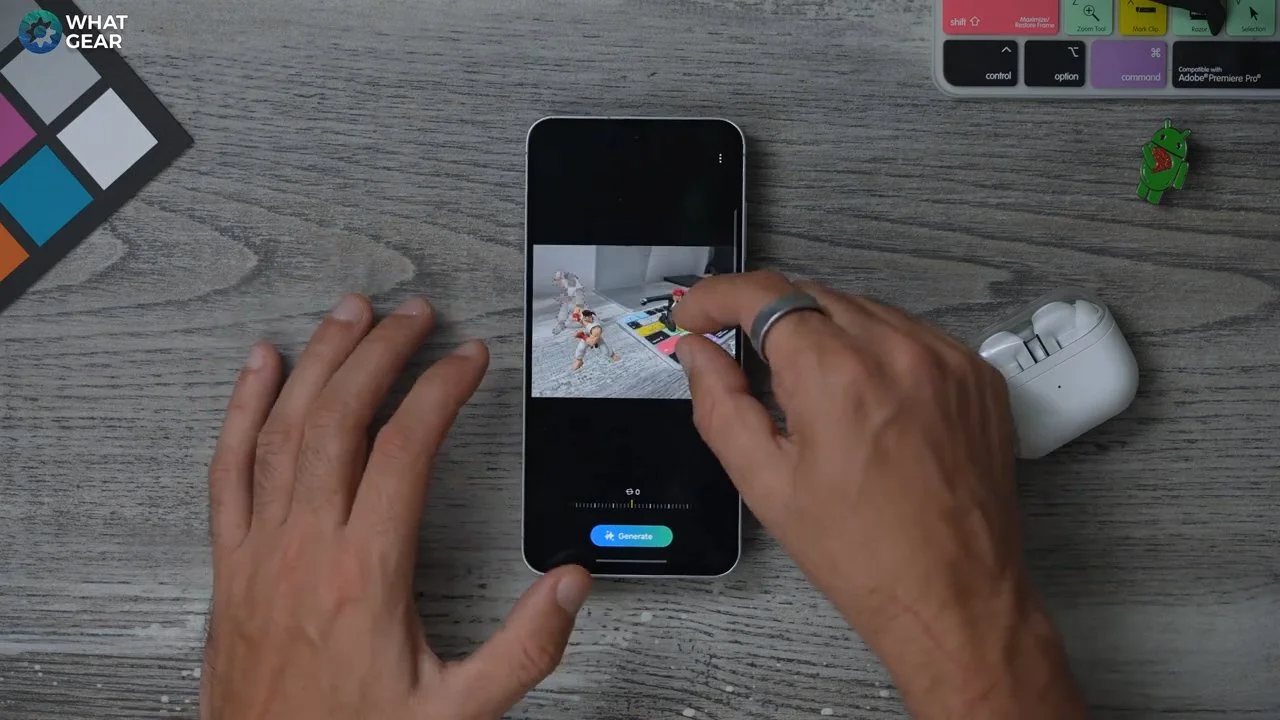
For example, if you hit the sparkly eye stars again let's say we want to resize real here within the image so we can just draw round. Now, if you hold your finger on that, you can actually expand or minimize the size of the character. So we can make it much bigger in the frame and the bits behind where he was before will be filled in using AI.
Now let's say we wanted to get rid of that character entirely. It's a similar process, so you just tap the sparkly stars, you draw around the person you want to delete from the image. This time, if you hold your finger down for a few seconds, the eraser icon will pop up just above. So if you tap on that and hit generate, this will assess the overall image and fill in the gaps to blend it in nicely.
And this often works really, really well. So that's after the erase and that's before.
AI Recorder
So I've been going on about a quarter app all the way through this video and for a good reason. So if we swap out the edge panel and open the record straight away, the first time you use it, it's going to show you what it can now do.
You can actually record lectures or meetings or even YouTube videos if you want to, transcribe them into words and then summarize them into bullet points. This is an incredibly useful tool, and I'll show you how this works. And it used to be limited to ten-minute recordings. Now it can actually go for a couple of hours and transcribe and bullet point everything.
So I recorded a couple of minutes of one of my videos within the recorder app. I'm just going to hit stop and save it now as soon as you save it. If you jump into the recording itself, you can transcribe immediately into text. It shouldn't take too long since it's only two minutes. If it's a couple of hours, of course, this is going to take way, way longer.
Straightaway you got a nice clear transcription of everything, and if you hit the little icon up here, you can translate it into another language and check this out. If you hit summary, hit okay. This then uses AI to summarize everything that was said in that text, and you can even jump to keywords within the text. This is a very, very useful tool and I highly recommend you utilize it.
Magic Compose
Okay, here's another very, very powerful Galaxy AI tool. And this is in regard to writing things. So I'm just going to open up a blank email. So within a text field if you're using the Samsung Galaxy Keyboard you will see the AI stars here on the left side. If you tap that you get a few options. Composer who literally writes something for you.
So let's say you need a sick note for work. And you'll notice just below you can change the format which is four. So it can be an email. It can be social media or comment on a post on a video for example, like this one.
So you've got casual and polite. So I'm going to go casual and hit generate. This harnesses the power of AI so that you can get a day of work. Now check this out. Here's another way you can use the AI writing tools. Let's say you've written a bit of texture self and you want to improve it or change the style.
If you highlight that text and then hit the AI stars again, you can go to writing styles and you have a bunch of different options to choose from. This is something I use for social media posts quite a bit because it adds all of the emojis and hashtags automatically. It's just so easy.
Website Summaries
So if you prefer to use Chrome on your phone as your go-to browser, what I recommend you do is add the Samsung Internet app to WI with one of the edge panels, or one of your other home screens.
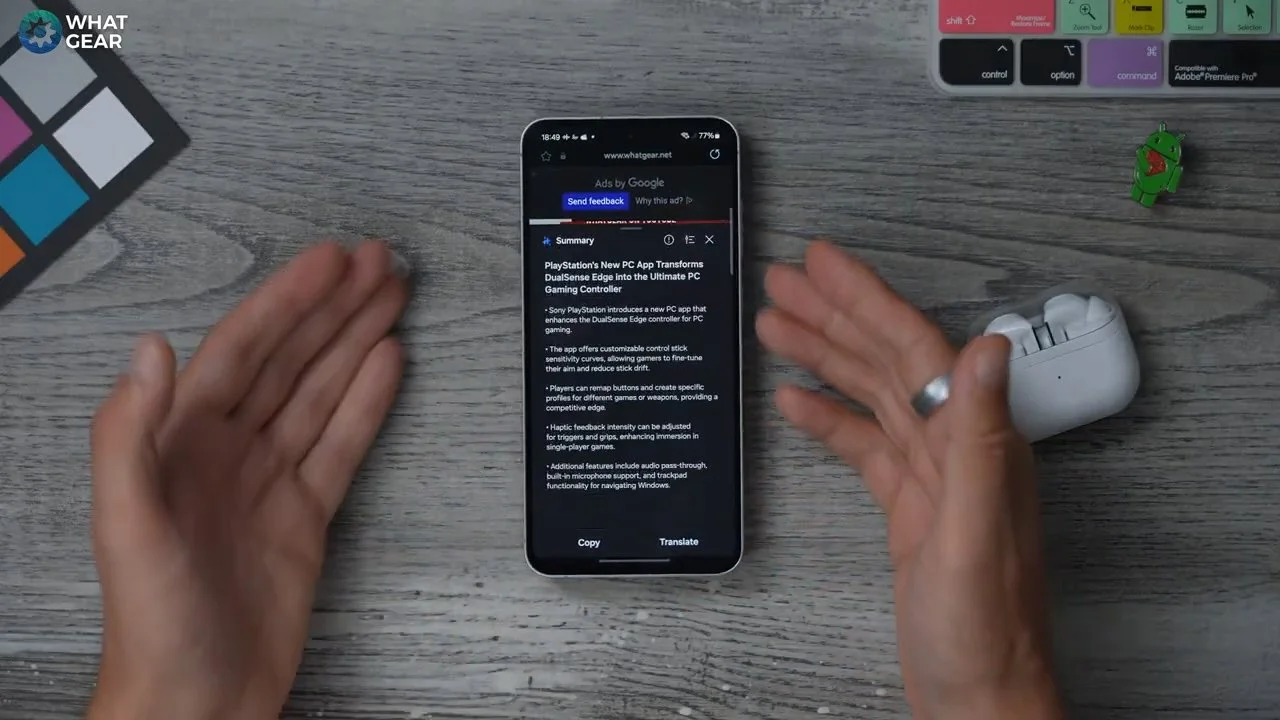
And the reason I say that is because of this very, very powerful tool within the Samsung browser app. So let's say there's a really useful article that you found online, and you want to grab the core information from it. If you hit the I stars at the bottom of that web page, you then get the option to summarize that page into bullet points.
So just hit summarize there. It reads the entire page for you. And then you have these really nice concise bullet points. And you can actually expand on these a bit as well. So if you hit the little button here just next to the cross and go to detailed, it will just add a bit more information to those bullet points.
This is a great tool for researching pretty much anything online.
AI Sketches
Okay, here's another AI tool. Remember the edge panels? Swipe those out at the top. Here you'll see this little pen icon. This is a tool that allows you to draw anything from scratch and then use AI to generate it. So this kind of works like that. Sketch the image, except there's no image this time.
So let's say I draw, I don't know, a sunflower or some kind of flower. Actually, this is probably going to turn into a windmill, so let's turn it into a windmill. Now, once you've drawn your image, you can use the little dropdown menu here to choose what kind of style you want it to be. This illustration and hit generate.
I'm interested to see whether this is a sunflower or windmill.
And this is just a good example of how bad your drawing skills can be, and how good they can end up looking. And there we go. You get a few different options and it has turned out to be a flower, which is what it was originally supposed to be. So that's good.
Smart Select
The other tool that exists here on the edge panel is this one, which is the smart Select tool.
So you can draw around anything that's on the screen similar to the Circle to search feature. But this actually allows you to download what you selected to your gallery.
You can also share it from here or copy information from this selection for example the text. So if you hit the text tool here, it highlights all of the text that's within that window.
And then you can add that to a note or just copy it to a clipboard. So it's a very very powerful tool for extracting information or saving screenshots but not the entire screen, just part of the screen. So it's a fantastic tool. Definitely use the Smart Select. So thank you for making it all the way to the end of this video.
Fully Optimized
Before you go, here’s one last tip you’ll want to enable right away to keep your device running smoothly.
Auto Optimization in Device Care:
In Settings, go to Device Care, and scroll down to find Auto Optimization. By default, this is off, but enabling it allows your phone to restart when needed—like when it’s overheating or overworked.
You can also set a scheduled restart time and don’t worry, it won’t restart while you’re actively using it; it’ll typically restart at night.
Quick Device Refresh:
Remember the widget we set up for memory and storage? Tap the small brush icon on it to clear background RAM and give your device a speed boost if it feels sluggish.
If you’d like a dedicated video on camera features, let me know in the comments. see you in the next video!


